面動(dòng)畫、轉(zhuǎn)場(chǎng)動(dòng)畫開發(fā)詳解")
動(dòng)畫效果
需求分析
分析方法
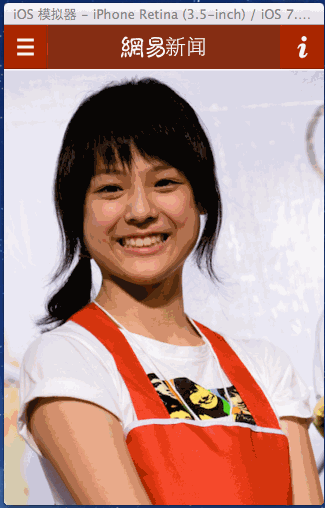
下載這個(gè)gif動(dòng)圖,用mac默認(rèn)的打開方式打開這個(gè)gif圖(雙擊圖片即可),效果如下
面動(dòng)畫、轉(zhuǎn)場(chǎng)動(dòng)畫開發(fā)詳解")
鼠標(biāo)選中紅色箭頭所指的位置,然后按住鍵盤方向鍵下鍵,圖片會(huì)以緩慢的可控的速度播放,便于分析動(dòng)畫的構(gòu)成。
小tips:macos系統(tǒng)想正常瀏覽一個(gè)gif動(dòng)圖,可以鼠標(biāo)單擊圖片后按空格,也可以選擇用瀏覽器打開,gif圖會(huì)以正常速度播放。
技術(shù)點(diǎn)分析
如何生成一個(gè)動(dòng)畫讓控件執(zhí)行?
現(xiàn)流行的方式主要有三種:
1、基本動(dòng)畫
2、核心動(dòng)畫
3、三方框架——POP框架(由Facebook開發(fā))
它們的主要差別:
1、控件的位置、大小等是不是真的發(fā)生了改變?
基本動(dòng)畫、pop動(dòng)畫,是給控件添加動(dòng)畫(一般也不會(huì)有用基本動(dòng)畫給layer添加動(dòng)畫的做法),所有動(dòng)畫完成時(shí),控件的屬性已經(jīng)改變,而核心動(dòng)畫,是給控件的圖層(view.layer)添加動(dòng)畫,看似發(fā)生了位置大小的變化,實(shí)際上控件本身的屬性并未改變。
2、它們分別的優(yōu)劣勢(shì)
2.1、基本動(dòng)畫
優(yōu)勢(shì):代碼簡(jiǎn)單,代碼量少
劣勢(shì):功能相對(duì)單一
2.2、核心動(dòng)畫的優(yōu)勢(shì)
優(yōu)勢(shì):功能強(qiáng)大、流暢性好、連續(xù)幾個(gè)動(dòng)畫之間的銜接度好。流暢主要是因?yàn)椴僮鱨ayer是輕量級(jí)的,不容易產(chǎn)生動(dòng)畫卡頓的感覺。
劣勢(shì):代碼量大;容易寫錯(cuò)(某些參數(shù)沒有定義宏,寫錯(cuò)了都不知道);如有需要,還要手動(dòng)在動(dòng)畫完成時(shí)將控件的屬性同步修改了。
2.3、pop動(dòng)畫的優(yōu)勢(shì)
優(yōu)勢(shì):比核心動(dòng)畫代碼要簡(jiǎn)單,最大的優(yōu)勢(shì)在于,容易做彈簧效果,所以很多有“Q彈”感覺的都用pop動(dòng)畫做
劣勢(shì):要在一個(gè)動(dòng)畫完成時(shí)開始另一個(gè)動(dòng)畫,pop動(dòng)畫不擅長(zhǎng),主要因?yàn)樗膭?dòng)畫執(zhí)行時(shí)間由"速度"和"彈性系數(shù)"兩個(gè)參數(shù)控制,不好直觀判斷動(dòng)畫執(zhí)行了多久,而如果在pop動(dòng)畫完成回調(diào)的block里提交下一個(gè)動(dòng)畫,會(huì)不連貫(親測(cè),原因不詳)。
轉(zhuǎn)場(chǎng)動(dòng)畫怎么實(shí)現(xiàn)?
明明從A控制器跳往B控制器,各是各的頁(yè)面,各是各的控件,怎么做到A里的控件變化形成了B的控件的效果?
的確,A和B是兩個(gè)獨(dú)立的頁(yè)面,它們跳轉(zhuǎn)過程需要?jiǎng)赢嫷男Ч麜r(shí),需要另外一個(gè)呈現(xiàn)于屏幕上的載體(或者稱頁(yè)面)來(lái)裝那些做動(dòng)畫的控件,然后在動(dòng)畫完成、轉(zhuǎn)場(chǎng)結(jié)束時(shí),把這個(gè)載體移除掉,宣告轉(zhuǎn)場(chǎng)結(jié)束,這個(gè)時(shí)候把真正的B的頁(yè)面展示出來(lái)。
這就需要轉(zhuǎn)場(chǎng)代理transitioningDelegate發(fā)揮作用了,具體做法和原理下文詳述。
登錄頁(yè)分解、實(shí)現(xiàn)
點(diǎn)擊了GET按鈕,logo圖和logo文字上移
面動(dòng)畫、轉(zhuǎn)場(chǎng)動(dòng)畫開發(fā)詳解")
思路:
移動(dòng)屬于比較簡(jiǎn)單的操作,但這個(gè)移動(dòng)效果具有彈簧效果,所以可以采用核心動(dòng)畫中的關(guān)鍵幀動(dòng)畫CAKeyframeAnimation,或者pop動(dòng)畫來(lái)實(shí)現(xiàn),這里我用了pop,后面登錄失敗按鈕左右擺動(dòng)的動(dòng)畫,我用了CAKeyframeAnimation。
代碼:
//圖片移動(dòng)動(dòng)畫POPSpringAnimation *anim4 = [POPSpringAnimation animationWithPropertyNamed:kPOPViewFrame];//kPOPViewFrame表示改變的值是frame//動(dòng)畫開始的值(.yy_x是我寫的分類的語(yǔ)法,等同于.frame.origin.x,其它同理)anim4.fromValue = [NSValue valueWithCGRect:CGRectMake(self.LoginImage.yy_x, self.LoginImage.yy_y, self.LoginImage.yy_width, self.LoginImage.yy_height)];//動(dòng)畫結(jié)束時(shí)的值anim4.toValue = [NSValue valueWithCGRect:CGRectMake(self.LoginImage.yy_x, self.LoginImage.yy_y-75, self.LoginImage.yy_width, self.LoginImage.yy_height)];//開始的時(shí)間anim4.beginTime = CACurrentMediaTime()+0.2;//彈性系數(shù)anim4.springBounciness = YYSpringBounciness;//YYSpringBounciness是我定義的靜態(tài)變量,值是16.0//速度anim4.springSpeed = YYSpringSpeed;//YYSpringSpeed是我定義的靜態(tài)變量,值是6.0//加到控件上執(zhí)行[self.LoginImage pop_addAnimation:anim4 forKey:nil];//文字移動(dòng)動(dòng)畫POPSpringAnimation *anim5 = [POPSpringAnimation animationWithPropertyNamed:kPOPViewFrame];anim5.fromValue = [NSValue valueWithCGRect:CGRectMake(self.LoginWord.yy_x, self.LoginWord.yy_y, self.LoginWord.yy_width, self.LoginWord.yy_height)];anim5.toValue = [NSValue valueWithCGRect:CGRectMake(self.LoginWord.yy_x, self.LoginWord.yy_y-75, self.LoginWord.yy_width, self.LoginWord.yy_height)];anim5.beginTime = CACurrentMediaTime()+0.2;anim5.springBounciness = YYSpringBounciness;anim5.springSpeed = YYSpringSpeed;[self.LoginWord pop_addAnimation:anim5 forKey:nil];
點(diǎn)擊get按鈕出現(xiàn)輸入框
面動(dòng)畫、轉(zhuǎn)場(chǎng)動(dòng)畫開發(fā)詳解")
1、get按鈕的變化
思路:
get按鈕分別進(jìn)行了變寬、變寬的同時(shí)圓角變小,然后變高,然后向上移動(dòng),整個(gè)過程顏色由初始顏色變白。由于這是N個(gè)動(dòng)畫,有同時(shí)執(zhí)行的,有接著上一步執(zhí)行的,所以我選擇核心動(dòng)畫CABasicAnimation,更容易控制每個(gè)動(dòng)畫的執(zhí)行時(shí)間、開始時(shí)間,容易銜接得流暢。
代碼:
//get背景顏色CABasicAnimation *changeColor1 = [CABasicAnimation animationWithKeyPath:@"backgroundColor"];changeColor1.fromValue = (__bridge id)ButtonColor.CGColor;changeColor1.toValue = (__bridge id)[UIColor whiteColor].CGColor;changeColor1.duration = 0.8f;changeColor1.beginTime = CACurrentMediaTime();//以下兩個(gè)參數(shù),是為了動(dòng)畫完成后,控件的樣子不回到動(dòng)畫前的樣子//因?yàn)樯衔闹刑岬竭^,核心動(dòng)畫是給layer做動(dòng)畫,控件本身的屬性不會(huì)變changeColor1.fillMode = kCAFillModeForwards;changeColor1.removedOnCompletion = false;[animView.layer addAnimation:changeColor1 forKey:changeColor1.keyPath];//get按鈕變寬CABasicAnimation *anim1 = [CABasicAnimation animationWithKeyPath:@"bounds.size.width"];anim1.fromValue = @(CGRectGetWidth(animView.bounds));anim1.toValue = @(YYScreenW*0.8);anim1.duration = 0.1;anim1.beginTime = CACurrentMediaTime();anim1.fillMode = kCAFillModeForwards;anim1.removedOnCompletion = false;[animView.layer addAnimation:anim1 forKey:anim1.keyPath];//get按鈕變高CABasicAnimation *anim2 = [CABasicAnimation animationWithKeyPath:@"bounds.size.height"];anim2.fromValue = @(CGRectGetHeight(animView.bounds));anim2.toValue = @(YYScreenH*0.3);anim2.duration = 0.1;anim2.beginTime = CACurrentMediaTime()+0.1;anim2.fillMode = kCAFillModeForwards;anim2.removedOnCompletion = false;[animView.layer addAnimation:anim2 forKey:anim2.keyPath];//get按鈕移動(dòng)動(dòng)畫//這里的移動(dòng)跟logo的移動(dòng)是同步的,所以用popPOPSpringAnimation *anim3 = [POPSpringAnimation animationWithPropertyNamed:kPOPViewCenter];anim3.fromValue = [NSValue valueWithCGRect:CGRectMake(animView.yy_centerX, animView.yy_centerY, animView.yy_width, animView.yy_height)];anim3.toValue = [NSValue valueWithCGRect:CGRectMake(animView.yy_centerX, animView.yy_centerY-75, animView.yy_width, animView.yy_height)];anim3.beginTime = CACurrentMediaTime()+0.2;anim3.springBounciness = YYSpringBounciness;anim3.springSpeed = YYSpringSpeed;[animView pop_addAnimation:anim3 forKey:nil];2、輸入框出現(xiàn)、LOGIN按鈕出現(xiàn)思路:輸入框是透明度的改變,LOGIN按鈕是大小的改變。代碼://賬號(hào)密碼輸入框出現(xiàn)self.userTextField.alpha = 0.0;self.passwordTextField.alpha = 0.0;[UIView animateWithDuration:0.4 delay:0.2 options:UIViewAnimationOptionCurveEaseInOut animations:^{ self.userTextField.alpha = 1.0; self.passwordTextField.alpha = 1.0;} completion:^(BOOL finished) { }];//login按鈕出現(xiàn)動(dòng)畫self.LoginButton.yy_centerX = YYScreenW*0.5;self.LoginButton.yy_centerY = YYScreenH*0.7+44+(YYScreenH*0.3-44)*0.5-75;CABasicAnimation *animLoginBtn = [CABasicAnimation animationWithKeyPath:@"bounds.size"];animLoginBtn.fromValue = [NSValue valueWithCGSize:CGSizeMake(0, 0)];animLoginBtn.toValue = [NSValue valueWithCGSize:CGSizeMake(YYScreenW*0.5, 44)];animLoginBtn.duration = 0.4;animLoginBtn.beginTime = CACurrentMediaTime()+0.2;animLoginBtn.fillMode = kCAFillModeForwards;animLoginBtn.removedOnCompletion = false;animLoginBtn.delegate = self;//在代理方法(動(dòng)畫完成回調(diào))里,讓按鈕真正的寬高改變,而不僅僅是它的layer,否則看得到點(diǎn)不到[self.LoginButton.layer addAnimation:animLoginBtn forKey:animLoginBtn.keyPath];/** 動(dòng)畫執(zhí)行結(jié)束回調(diào) */- (void)animationDidStop:(CAAnimation *)anim finished:(BOOL)flag{ if ([((CABasicAnimation *)anim).keyPath isEqualToString:@"bounds.size"]) { self.LoginButton.bounds = CGRectMake(YYScreenW*0.5, YYScreenH*0.7+44+(YYScreenH*0.3-44)*0.5-75, YYScreenW*0.5, 44); }}點(diǎn)擊LOGIN,按鈕轉(zhuǎn)圈
面動(dòng)畫、轉(zhuǎn)場(chǎng)動(dòng)畫開發(fā)詳解")
思路:
點(diǎn)擊了LOGIN,按鈕先從寬變圓,然后給按鈕添加一條半圓的白色圓弧線,然后讓這個(gè)按鈕開始旋轉(zhuǎn)。
代碼:
//執(zhí)行登錄按鈕轉(zhuǎn)圈動(dòng)畫的view//為了不影響按鈕本身的效果,這里新建一個(gè)空間做轉(zhuǎn)圈動(dòng)畫self.LoginAnimView = [[UIView alloc] initWithFrame:self.LoginButton.frame];self.LoginAnimView.layer.cornerRadius = 10;self.LoginAnimView.layer.masksToBounds = YES;self.LoginAnimView.frame = self.LoginButton.frame;self.LoginAnimView.backgroundColor = self.LoginButton.backgroundColor;[self.view addSubview:self.LoginAnimView];self.LoginButton.hidden = YES;//把view從寬的樣子變圓CGPoint centerPoint = self.LoginAnimView.center;CGFloat radius = MIN(self.LoginButton.frame.size.width, self.LoginButton.frame.size.height);[UIView animateWithDuration:0.3 delay:0 options:UIViewAnimationOptionCurveEaseOut animations:^{ self.LoginAnimView.frame = CGRectMake(0, 0, radius, radius); self.LoginAnimView.center = centerPoint; self.LoginAnimView.layer.cornerRadius = radius/2; self.LoginAnimView.layer.masksToBounds = YES; }completion:^(BOOL finished) { //給圓加一條不封閉的白色曲線 UIBezierPath* path = [[UIBezierPath alloc] init]; [path addArcWithCenter:CGPointMake(radius/2, radius/2) radius:(radius/2 - 5) startAngle:0 endAngle:M_PI_2 * 2 clockwise:YES]; self.shapeLayer = [[CAShapeLayer alloc] init]; self.shapeLayer.lineWidth = 1.5; self.shapeLayer.strokeColor = [UIColor whiteColor].CGColor; self.shapeLayer.fillColor = self.LoginButton.backgroundColor.CGColor; self.shapeLayer.frame = CGRectMake(0, 0, radius, radius); self.shapeLayer.path = path.CGPath; [self.LoginAnimView.layer addSublayer:self.shapeLayer]; //讓圓轉(zhuǎn)圈,實(shí)現(xiàn)"加載中"的效果 CABasicAnimation* baseAnimation = [CABasicAnimation animationWithKeyPath:@"transform.rotation"]; baseAnimation.duration = 0.4; baseAnimation.fromValue = @(0); baseAnimation.toValue = @(2 * M_PI); baseAnimation.repeatCount = MAXFLOAT; [self.LoginAnimView.layer addAnimation:baseAnimation forKey:nil];}];登錄失敗按鈕抖動(dòng)
面動(dòng)畫、轉(zhuǎn)場(chǎng)動(dòng)畫開發(fā)詳解")
思路:
這個(gè)效果跟pop動(dòng)畫移動(dòng)后抖動(dòng)的效果很類似,這里我選擇用關(guān)鍵幀動(dòng)畫CAKeyframeAnimation做,它與CABasicAnimation略有不同,CABasicAnimation是從一個(gè)值到另一個(gè)值,CAKeyframeAnimation是值變化的數(shù)組。
代碼:
//給按鈕添加左右擺動(dòng)的效果(關(guān)鍵幀動(dòng)畫)CAKeyframeAnimation *keyFrame = [CAKeyframeAnimation animationWithKeyPath:@"position"];CGPoint point = self.LoginAnimView.layer.position;//這個(gè)參數(shù)就是值變化的數(shù)組keyFrame.values = @[[NSValue valueWithCGPoint:CGPointMake(point.x, point.y)], [NSValue valueWithCGPoint:CGPointMake(point.x - 10, point.y)], [NSValue valueWithCGPoint:CGPointMake(point.x + 10, point.y)], [NSValue valueWithCGPoint:CGPointMake(point.x - 10, point.y)], [NSValue valueWithCGPoint:CGPointMake(point.x + 10, point.y)], [NSValue valueWithCGPoint:CGPointMake(point.x - 10, point.y)], [NSValue valueWithCGPoint:CGPointMake(point.x + 10, point.y)], [NSValue valueWithCGPoint:point]];//timingFunction意思是動(dòng)畫執(zhí)行的效果(這個(gè)屬性玩HTML+CSS的童鞋應(yīng)該很熟悉吧)//kCAMediaTimingFunctionEaseInEaseOut表示淡入淡出keyFrame.timingFunction = [CAMediaTimingFunction functionWithName:kCAMediaTimingFunctionEaseInEaseOut];keyFrame.duration = 0.5f;[self.LoginButton.layer addAnimation:keyFrame forKey:keyFrame.keyPath];
轉(zhuǎn)場(chǎng)動(dòng)畫的原理和實(shí)現(xiàn)方法
上文說(shuō)到,從A跳向B,需要一個(gè)中間載體來(lái)做動(dòng)畫,那么怎么得到這個(gè)載體呢?
需要用到轉(zhuǎn)場(chǎng)代理transitioningDelegate。
具體做法、步驟:
1、從A控制器跳到B控制器,寫跳轉(zhuǎn)的代碼時(shí)候,賦值代理
YYFirstViewController *vc = [[YYFirstViewController alloc] init];vc.transitioningDelegate = self;//也就是這里[self presentViewController:vc animated:YES completion:nil];
2、A控制器遵守代理,實(shí)現(xiàn)代理方法
//遵守代理@interface YYLoginViewController () #pragma mark UIViewControllerTransitioningDelegate(轉(zhuǎn)場(chǎng)動(dòng)畫代理)//這個(gè)是B回到A時(shí)執(zhí)行的方法- (id)animationControllerForDismissedController:(UIViewController *)dismissed{ //暫時(shí)別糾結(jié)YYLoginTranslation是什么,看下文 YYLoginTranslation *loginTranslation = [[YYLoginTranslation alloc] init]; return loginTranslation;}//這個(gè)是A跳到B時(shí)執(zhí)行的方法- (id)animationControllerForPresentedController:(UIViewController *)presented presentingController:(UIViewController *)presenting sourceController:(UIViewController *)source{ YYLoginTranslation *loginTranslation = [[YYLoginTranslation alloc] init]; return loginTranslation;} 3、顯而易見,上述兩個(gè)方法需要返回一個(gè)遵守了
//類的.h文件#import #import @interface YYLoginTranslation : NSObject @end//類的.m文件#import "YYLoginTranslation.h"@interface YYLoginTranslation () @end@implementation YYLoginTranslation//代碼方法-轉(zhuǎn)場(chǎng)時(shí)長(zhǎng)- (NSTimeInterval)transitionDuration:(id)transitionContext{ return 1.0;}//代理方法-轉(zhuǎn)場(chǎng)動(dòng)畫的代碼- (void)animateTransition:(id)transitionContext{ //transitionContext:轉(zhuǎn)場(chǎng)上下文 //轉(zhuǎn)場(chǎng)過程中顯示的view,所有動(dòng)畫控件都應(yīng)該加在這上面 //這就是那個(gè)所謂的載體 UIView* containerView = [transitionContext containerView]; //在這里把要做動(dòng)畫效果的控件往containerView上面加 //開始開心的做動(dòng)畫 //最后,在動(dòng)畫完成的時(shí)候,記得標(biāo)識(shí)轉(zhuǎn)場(chǎng)結(jié)束 [transitionContext completeTransition:YES];}4、現(xiàn)在回頭看第2步,那個(gè)返回的對(duì)象,就是我們第三步創(chuàng)建的類的對(duì)象。從A跳到B開始時(shí),會(huì)先來(lái)到第2步中的"這個(gè)是A跳到B時(shí)執(zhí)行的方法",根據(jù)你返回的對(duì)象,去對(duì)象中找代理方法,執(zhí)行里面的代碼,也就是第三步中的"代理方法-轉(zhuǎn)場(chǎng)動(dòng)畫的代碼"這個(gè)方法,這里代碼執(zhí)行結(jié)束后,控制器跳轉(zhuǎn)也就完成了。
轉(zhuǎn)場(chǎng)動(dòng)畫分解、實(shí)現(xiàn)
面動(dòng)畫、轉(zhuǎn)場(chǎng)動(dòng)畫開發(fā)詳解")
面動(dòng)畫、轉(zhuǎn)場(chǎng)動(dòng)畫開發(fā)詳解")
思路:
如上圖AB控制器本來(lái)的樣子是這樣,轉(zhuǎn)場(chǎng)動(dòng)畫需要完成一下操作:
1、LOGO圖逐漸消失;
2、LOGO文字逐漸變小、上移至B中頭部文字的位置;
3、A控制器的登錄框消失、A控制器背景顏色變白;
4、轉(zhuǎn)圈控件經(jīng)過弧線運(yùn)動(dòng)到右下角,白色加號(hào)逐漸形成
5、B控制器背景圖上移的動(dòng)畫。
下面分析下第4步和第2步的做法。
圓形的弧線位移、加號(hào)的出現(xiàn)
面動(dòng)畫、轉(zhuǎn)場(chǎng)動(dòng)畫開發(fā)詳解")
圓形的弧線位移、加號(hào)的出現(xiàn).gif
思路:
先用設(shè)定一條曲線,然后讓圓沿著曲線移動(dòng),最后把加號(hào)展示出來(lái)。
代碼:
//設(shè)定曲線CGMutablePathRef path = CGPathCreateMutable();//開始的點(diǎn)CGPathMoveToPoint(path, NULL, (circularAnimView.yy_x+circularAnimView.yy_width*0.5), (circularAnimView.yy_y+circularAnimView.yy_height*0.5));//設(shè)置結(jié)束的點(diǎn)和拉力點(diǎn),第三個(gè)參數(shù)是拉力點(diǎn)CGPathAddQuadCurveToPoint(path, NULL, YYScreenW*0.9, circularAnimView.yy_y+circularAnimView.yy_height, (originalX+circularAnimView.yy_width*0.5), (originalY+circularAnimView.yy_height*0.5));CAKeyframeAnimation *animate = [CAKeyframeAnimation animationWithKeyPath:@"position"];animate.delegate = self;//在動(dòng)畫結(jié)束的代理方法中讓加號(hào)出現(xiàn)animate.duration = 0.4;animate.beginTime = CACurrentMediaTime()+0.15;animate.fillMode = kCAFillModeForwards;animate.repeatCount = 0;animate.path = path;//移動(dòng)路徑animate.removedOnCompletion = NO;CGPathRelease(path);[circularAnimView.layer addAnimation:animate forKey:@"circleMoveAnimation"];
生成曲線的原理:
設(shè)置開始的點(diǎn)、結(jié)束的點(diǎn)、拉力點(diǎn),首先會(huì)從開始點(diǎn)指結(jié)束點(diǎn)形成一條直線,然后向拉力點(diǎn)彎曲,就好像,拉力點(diǎn)會(huì)“伸出一只手”,把線拉彎。
面動(dòng)畫、轉(zhuǎn)場(chǎng)動(dòng)畫開發(fā)詳解")
logo文字的縮小、移動(dòng)
面動(dòng)畫、轉(zhuǎn)場(chǎng)動(dòng)畫開發(fā)詳解")
思路:
這是一個(gè)UILabel,它的形變就不能靠改變frame實(shí)現(xiàn)了,因?yàn)槿绻憧s小它的寬度,當(dāng)寬度不夠裝內(nèi)容時(shí),內(nèi)容會(huì)顯示不全,顯示不下的會(huì)用...代替。所以縮小UILabel需要靠專門的形變屬性。至于移動(dòng)就好說(shuō)了,只需要算準(zhǔn)位置。
代碼:
CGFloat proportion = toVC.navWord.yy_width / fromVC.LoginWord.yy_width;CABasicAnimation * LoginWordScale = [CABasicAnimation animationWithKeyPath:@"transform.scale"];LoginWordScale.fromValue = [NSNumber numberWithFloat:1.0];LoginWordScale.toValue = [NSNumber numberWithFloat:proportion];LoginWordScale.duration = 0.4;LoginWordScale.beginTime = CACurrentMediaTime()+0.15;LoginWordScale.removedOnCompletion = NO;LoginWordScale.fillMode = kCAFillModeForwards;[fromVC.LoginWord.layer addAnimation:LoginWordScale forKey:LoginWordScale.keyPath];CGPoint newPosition = [toVC.view convertPoint:toVC.navWord.center fromView:toVC.navView];[UIView animateWithDuration:0.4 delay:0.15 options:UIViewAnimationOptionCurveEaseInOut animations:^{ fromVC.LoginWord.yy_centerX = newPosition.x; fromVC.LoginWord.yy_centerY = newPosition.y;} completion:^(BOOL finished) { }];退出登錄動(dòng)畫
面動(dòng)畫、轉(zhuǎn)場(chǎng)動(dòng)畫開發(fā)詳解")
思路:
這個(gè)效果比較簡(jiǎn)單,但同時(shí)也比較實(shí)用。實(shí)現(xiàn)方式就是改變兩個(gè)控制器view的透明度。
代碼:
//transitionContext:轉(zhuǎn)場(chǎng)上下文//轉(zhuǎn)場(chǎng)過程中顯示的view,所有動(dòng)畫控件都應(yīng)該加在這上面UIView *containerView = [transitionContext containerView];//轉(zhuǎn)場(chǎng)的來(lái)源控制器YYLoginViewController* toVC = (YYLoginViewController *)[transitionContext viewControllerForKey:UITransitionContextToViewControllerKey];//轉(zhuǎn)場(chǎng)去往的控制器YYFirstViewController* fromVC = (YYFirstViewController *)[transitionContext viewControllerForKey:UITransitionContextFromViewControllerKey];//做一個(gè)淡入淡出的效果toVC.view.alpha = 0;[containerView addSubview:toVC.view];[UIView animateWithDuration:1.0 animations:^{ fromVC.view.alpha = 0;} completion:^(BOOL finished) {}];[UIView animateWithDuration:0.6 delay:0.4 options:UIViewAnimationOptionCurveEaseInOut animations:^{ toVC.view.alpha = 1;} completion:^(BOOL finished) { [transitionContext completeTransition:YES];}];備注
POP框架的手動(dòng)集成報(bào)錯(cuò)的問題
pop框架推薦使用pods集成,如果要手動(dòng)集成的話,比較麻煩,由于處理這個(gè)問題的時(shí)間已經(jīng)有點(diǎn)久了,集成的麻煩點(diǎn)記不全了,大概就是它框架里的所有頭文件的import方式要從<>改成"",還有它好像有個(gè).cpp文件,要把后綴改成.mm,還有什么記不住了。
如果需要手動(dòng)集成pop框架,可以下這個(gè)demo,里面有手動(dòng)集成的pop框架,直接把整個(gè)文件夾拖走即可。
Demo下載地址:https://github.com/YYProgrammer/YYLoginTranslationDemo
以上就是本次小編為大家整理的全部?jī)?nèi)容,感謝你對(duì)VEVB武林網(wǎng)的支持。
新聞熱點(diǎn)


疑難解答
圖片精選
網(wǎng)友關(guān)注