前言
本文主要給大家介紹了關(guān)于swift 4自定義UITableCell的相關(guān)內(nèi)容,分享出來供大家參考學(xué)習(xí)價(jià)值,下面話不多說了,來一起看看詳細(xì)的介紹吧
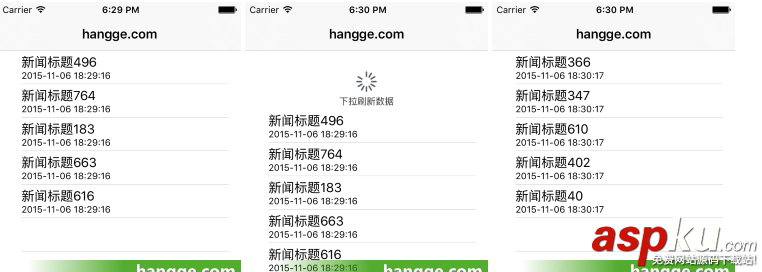
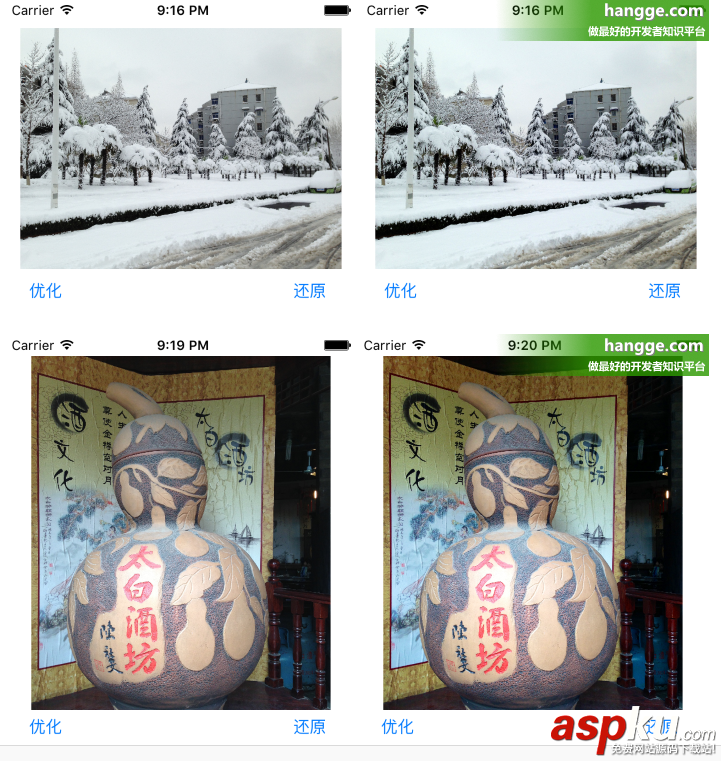
直接上圖
新建MenuCell
創(chuàng)建一個(gè)類 MenuCell 繼承 UITableViewCell 添加兩個(gè)要實(shí)現(xiàn)的方法
override init(style: UITableViewCellStyle, reuseIdentifier: String?) { super.init(style: style, reuseIdentifier: reuseIdentifier)}required init?(coder aDecoder: NSCoder) { super.init(coder: aDecoder)}初始化組件
把tableCell里要顯示的組件都初始化好,我這里就只有兩個(gè)組件
class MenuCell: UITableViewCell { var icon = UIImageView() var lazy var box = UIView() override init(style: UITableViewCellStyle, reuseIdentifier: String?) { super.init(style: style, reuseIdentifier: reuseIdentifier) box.addSubview(icon) box.addSubview(title) self.addSubview(box) }}組件加進(jìn)去了,接下來就是布局了,Github上有個(gè)star數(shù)很高的布局庫(kù),用pod安裝就可以用了,地址:https://github.com/SnapKit/SnapKit
布局
用法還是比較簡(jiǎn)單的,看文檔就能明白大概用法了,下面是我的布局
override init(style: UITableViewCellStyle, reuseIdentifier: String?) { super.init(style: style, reuseIdentifier: reuseIdentifier) box.addSubview(icon) box.addSubview(title) self.addSubview(box) icon.snp.makeConstraints { (make) in // 設(shè)置icon組件距離box組件左,上各10個(gè)距離單位(不太清楚是不是像素),偏移12個(gè)距離單位 make.left.top.equalTo(10).offset(12) // 設(shè)置icon的寬高各20個(gè)單位 make.width.height.equalTo(20) } title.snp.makeConstraints { (make) in // 設(shè)置title組件位置從icon組件的右邊開始算起,再偏移10個(gè)單位 make.left.equalTo(self.icon.snp.right).offset(10) // 設(shè)置title距離上面高度跟icon一樣 make.top.equalTo(self.icon) }}給TableCell附值
在 MenuCell 里新建一個(gè)方法,可以把在 TableView里創(chuàng)建好的數(shù)據(jù)傳過來并給icon,title,附上值
func setValueForCell(menu: MenuModel) { title.text = menu.title icon = ImageUtil.loadImageFromUrl(imageView: icon, url: menu.url)}方法里的 ImageUtil 是我封裝的一個(gè)靜態(tài)方法,用于顯示網(wǎng)絡(luò)圖片的
class ImageUtil { class func loadImageFromUrl(imageView: UIImageView, url: String) -> UIImageView { //定義URL對(duì)象 let url = URL(string: url) //從網(wǎng)絡(luò)獲取數(shù)據(jù)流 let data = try! Data(contentsOf: url!) //通過數(shù)據(jù)流初始化圖片 let newImage = UIImage(data: data) imageView.image = newImage return imageView }} 上面自定義的加載網(wǎng)絡(luò)圖片的方法會(huì)有很長(zhǎng)的延遲,當(dāng)點(diǎn)擊Cell進(jìn)入下一面的時(shí)候,網(wǎng)絡(luò)加載會(huì)花大量時(shí)間,這樣會(huì)導(dǎo)致頁面出現(xiàn)白屏,解決辦法有兩個(gè),一個(gè)是把加載圖片的地方改成異步加載,一個(gè)是引用第三方的圖片加載庫(kù)
將網(wǎng)絡(luò)消耗的代碼放在異步線程里方法
func setValueForCell(menu: MenuModel) { title.text = menu.title DispatchQueue.global().async { self.icon = ImageUtil.loadImageFromUrl(imageView: self.icon, url: menu.url) } //icon = ImageUtil.loadImageFromUrl(imageView: icon, url: menu.url)}這樣程序就不會(huì)卡了,運(yùn)行會(huì)看到圖片最開始是沒有的,然后慢慢的加載出來,但這樣xcode會(huì)報(bào)一個(gè)錯(cuò) UIImageView.image must be used from main thread only 網(wǎng)上查了一下,這是把ui操作放在異步里執(zhí)行的問題,如果一個(gè)異步操作耗時(shí)很長(zhǎng),那么程序就會(huì)進(jìn)入假死狀態(tài),系統(tǒng)就會(huì)彈出 就用無響應(yīng) 這樣的提示,所以這種是不推薦的
另一種是引入第三方類庫(kù) https://github.com/onevcat/Kingfisher
用法也很簡(jiǎn)單
import Kingfisherlet url = URL(string: menu.icon)//設(shè)置加載菊花self.icon.kf.indicatorType = .activityself.icon.kf.setImage(with: url)
方法里的 MenuModel 是我定義的一個(gè)菜單的結(jié)構(gòu)體
struct MenuModel { var title: String var url: String}處理TableView渲染方法
先在在tableView里注冊(cè)自己定義的 TableCell
override func viewDidLoad() { // ... //注冊(cè)cell的Identifier,用于渲染cell self.tableView.register(MenuCell.self, forCellReuseIdentifier: "cellID") }修改渲染方法
//渲染cellfunc tableView(_ tableView: UITableView, cellForRowAt indexPath: IndexPath) -> UITableViewCell { let cell = tableView.dequeueReusableCell(withIdentifier: "cellID") as! MenuCell cell.setValueForCell(menu: data[indexPath.row]) return cell}這樣就好了,直接運(yùn)行看效果吧
還是帶上圖片了app才好看
總結(jié)
以上就是這篇文章的全部?jī)?nèi)容了,希望本文的內(nèi)容對(duì)大家的學(xué)習(xí)或者工作具有一定的參考學(xué)習(xí)價(jià)值,如果有疑問大家可以留言交流,謝謝大家對(duì)VEVB武林網(wǎng)的支持。
新聞熱點(diǎn)


疑難解答
圖片精選