今天給大家?guī)硪粋€簡單的免費短信驗證碼實現(xiàn)demo,采用mob的短信驗證碼SDK,到目前為止還是免費的,只需要簡單的注冊--》添加個人應(yīng)用--》獲取appkey集apSecret 即可實現(xiàn)。
具體怎么申請,添加個人應(yīng)用這里就不累贅了,相信能搜索到本文的必然有能力完成上面的操作。
1、下載mob的免費短信驗證SDK,解壓后復(fù)制SMS_SDK到你的工程,因為此SDK采用OC編寫的,在與Swift結(jié)合時,需要添加橋接文件,具體操作如下:
右鍵你的Swift工程,新建一個OC文件,名字隨便起,這時會彈出提示你創(chuàng)建一個橋接文件,點擊是就OK了!在你的工程中會多出一個以工程名--Bridging-Header.h的文件,打開寫入下面的代碼:
#import <SMS_SDK/SMSSDK.h>
當(dāng)然,創(chuàng)建橋接文件的方法有很多種,會的就無需關(guān)注咯。
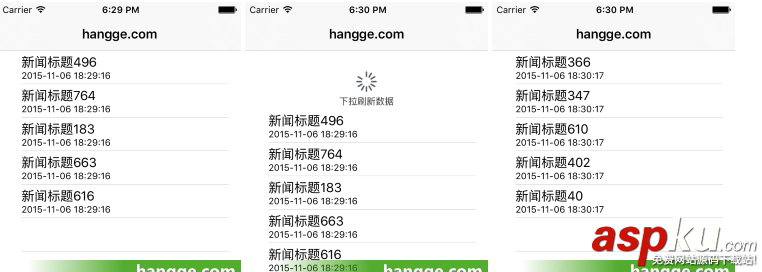
2、打開工程中的storyboard,創(chuàng)建一個電話號碼文本框、驗證碼文本框、獲取驗證碼按鈕、提交驗證按鈕。并對相關(guān)操作進(jìn)行ViewController連線,如下圖:
及動態(tài)倒計時功能")
3、在AppDelegate.swift文件中的func application(application: UIApplication, didFinishLaunchingWithOptions launchOptions: [NSObject: AnyObject]?) -> Bool中添加如下代碼:
SMSSDK.registerApp(你的appKey withSecret: 你的appSecret)
4、編寫ViewController.swift,具體就看代碼吧,很簡單的一個小功能,請各位自行擴(kuò)展吧。
// // ViewController.swift // Yundou // // Created by Slow on 16/1/2. // Copyright (c) 2016年 Ivan. All rights reserved. // import UIKit class ViewController: UIViewController { @IBOutlet weak var getAuthCodeButton: UIButton! //驗證碼文本框 @IBOutlet weak var authCodeText: UITextField! //手機(jī)號碼文本框 @IBOutlet weak var phoneText: UITextField! override func viewDidLoad() { super.viewDidLoad() // Do any additional setup after loading the view, typically from a nib. } override func didReceiveMemoryWarning() { super.didReceiveMemoryWarning() // Dispose of any resources that can be recreated. } //獲取驗證碼 @IBAction func getAuthCode(sender: UIButton) { var phoneNum = phoneText.text SMSSDK.getVerificationCodeByMethod(SMSGetCodeMethodSMS, phoneNumber:phoneNum, zone: "86",customIdentifier: nil,result: {(error: NSError!) ->Void in if(error == nil){ NSLog("發(fā)送成功") self.countDown(60) }else{ NSLog("發(fā)送失敗!%@" , error) } }) } //提交驗證碼 @IBAction func submitAuthCode(sender: UIButton) { var authCode = authCodeText.text var phoneNum = phoneText.text var resultMessage = "" SMSSDK.commitVerificationCode(authCode, phoneNumber: phoneNum, zone: "86" , result:{ (error: NSError!) -> Void in if(error == nil){ resultMessage = "恭喜您,驗證成功!" NSLog("驗證成功") }else{ resultMessage = "很抱歉,驗證失敗!" NSLog("驗證失敗!" , error) } let resultAlertView:UIAlertView = UIAlertView(title: "驗證結(jié)果", message: resultMessage, delegate: nil, cancelButtonTitle: "確定") resultAlertView.show() }) } //驗證碼倒計時 func countDown(timeOut:Int){ //倒計時時間 var timeout = timeOut var queue:dispatch_queue_t = dispatch_get_global_queue(DISPATCH_QUEUE_PRIORITY_DEFAULT, 0); var _timer:dispatch_source_t = dispatch_source_create(DISPATCH_SOURCE_TYPE_TIMER, 0, 0,queue) dispatch_source_set_timer(_timer, dispatch_walltime(nil, 0), 1*NSEC_PER_SEC, 0) //每秒執(zhí)行 dispatch_source_set_event_handler(_timer, { () -> Void in if(timeout<=0){ //倒計時結(jié)束,關(guān)閉 dispatch_source_cancel(_timer); dispatch_sync(dispatch_get_main_queue(), { () -> Void in //設(shè)置界面的按鈕顯示 根據(jù)自己需求設(shè)置 self.getAuthCodeButton.setTitle("再次獲取", forState: UIControlState.Normal) }) }else{//正在倒計時 var seconds = timeout % 60 var strTime = NSString.localizedStringWithFormat("%.2d", seconds) dispatch_sync(dispatch_get_main_queue(), { () -> Void in // NSLog("----%@", NSString.localizedStringWithFormat("%@S", strTime) as String) UIView.beginAnimations(nil, context: nil) UIView.setAnimationDuration(1) //設(shè)置界面的按鈕顯示 根據(jù)自己需求設(shè)置 self.getAuthCodeButton.setTitle(NSString.localizedStringWithFormat("%@S", strTime) as String, forState: UIControlState.Normal) UIView.commitAnimations() self.getAuthCodeButton.userInteractionEnabled = false }) timeout--; } }) dispatch_resume(_timer) } } 以上所述是小編給大家介紹的Swift免費短信驗證碼實現(xiàn)及動態(tài)倒計時功能,希望對大家有所幫助,如果大家有任何疑問請給我留言,小編會及時回復(fù)大家的。在此也非常感謝大家對VEVB武林網(wǎng)網(wǎng)站的支持!
新聞熱點


疑難解答
圖片精選