FragmentManager
為了管理Activity中的fragments,需要使用FragmentManager.
為了得到它,需要調(diào)用Activity中的getFragmentManager()方法。
因?yàn)镕ragmentManager的API是在Android 3.0,也即API level 11開始引入的,所以對于之前的版本,需要使用support library中的FragmentActivity,并且使用getSupportFragmentManager()方法。
用FragmentManager可以做的工作有:
得到Activity中存在的fragment:
使用findFragmentById()或findFragmentByTag()方法。
將fragment彈出back stack:
popBackStack():將back stack中最后一次的fragment轉(zhuǎn)換彈出。如果沒有可以出棧的東西,返回false。
這個函數(shù)是異步的:它將彈出棧的請求加入隊(duì)列,但是這個動作直到應(yīng)用回到事件循環(huán)才會執(zhí)行。
為back stack加上監(jiān)聽器:
addOnBackStackChangedListener()
Performing Fragment Transactions
使用Fragment時,可以通過用戶交互來執(zhí)行一些動作,比如增加、移除、替換等。
所有這些改變構(gòu)成一個集合,這個集合被叫做一個transaction。
可以調(diào)用FragmentTransaction中的方法來處理這個transaction,并且可以將transaction存進(jìn)由activity管理的back stack中,這樣用戶就可以進(jìn)行fragment變化的回退操作。
可以這樣得到FragmentTransaction類的實(shí)例:
FragmentManager fragmentManager = getFragmentManager();
FragmentTransaction fragmentTransaction = fragmentManager.beginTransaction();
每個transaction是一組同時執(zhí)行的變化的集合。
用add(), remove(), replace()方法,把所有需要的變化加進(jìn)去,然后調(diào)用commit()方法,將這些變化應(yīng)用。
在commit()方法之前,你可以調(diào)用addToBackStack(),把這個transaction加入back stack中去,這個back stack是由activity管理的,當(dāng)用戶按返回鍵時,就會回到上一個fragment的狀態(tài)。
比如下面的代碼就是用一個新的fragment取代之前的fragment,并且將前次的狀態(tài)存儲在back stack中。
// Create new fragment and transaction
Fragment newFragment = new ExampleFragment();
FragmentTransaction transaction = getFragmentManager().beginTransaction();
// Replace whatever is in the fragment_container view with this fragment,
// and add the transaction to the back stack
transaction.replace(R.id.fragment_container, newFragment);
transaction.addToBackStack(null);
// Commit the transaction
transaction.commit();
在這個例子中,newFragment將取代在R.id.fragment_container容器中的fragment,如果沒有,將直接添加新的fragment。
通過調(diào)用addToBackStack(),commit()的一系列轉(zhuǎn)換作為一個transaction被存儲在back stack中,用戶按Back鍵可以返回上一個轉(zhuǎn)換前的狀態(tài)。
當(dāng)你移除一個fragment的時候,如果commit()之前沒有調(diào)用addToBackStack(),那個fragment將會是destroyed;如果調(diào)用了addToBackStack(),這個fragment會是stopped,可以通過返回鍵來恢復(fù)。
關(guān)于commit()方法
調(diào)用commit()方法并不能立即執(zhí)行transaction中包含的改變動作,commit()方法把transaction加入activity的UI線程隊(duì)列中。
但是,如果覺得有必要的話,可以調(diào)用executePendingTransactions()方法來立即執(zhí)行commit()提供的transaction。
這樣做通常是沒有必要的,除非這個transaction被其他線程依賴。
注意:你只能在activity存儲它的狀態(tài)(當(dāng)用戶要離開activity時)之前調(diào)用commit(),如果在存儲狀態(tài)之后調(diào)用commit(),將會拋出一個異常。
這是因?yàn)楫?dāng)activity再次被恢復(fù)時commit之后的狀態(tài)將丟失。如果丟失也沒關(guān)系,那么使用commitAllowingStateLoss()方法。
實(shí)例程序
寫了個小程序?qū)嵺`了一下fragment的管理,程序不是很完善,就是試試基本用法,先按第一個按鈕添加一個fragment,第二個按鈕將其替換,第三個按鈕將第二個按鈕添加的fragment刪除。
相關(guān)代碼:
第一個fragment:
ExampleFragment.java
package com.example.learningfragment;
import android.os.Bundle;
import android.support.v4.app.Fragment;
import android.view.LayoutInflater;
import android.view.View;
import android.view.ViewGroup;
public class ExampleFragment extends Fragment
{
//三個一般必須重載的方法
@Override
public void onCreate(Bundle savedInstanceState)
{
// TODO Auto-generated method stub
super.onCreate(savedInstanceState);
System.out.println("ExampleFragment--onCreate");
}
@Override
public View onCreateView(LayoutInflater inflater, ViewGroup container,
Bundle savedInstanceState)
{
System.out.println("ExampleFragment--onCreateView");
return inflater.inflate(R.layout.example_fragment_layout, container, false);
}
@Override
public void onPause()
{
// TODO Auto-generated method stub
super.onPause();
System.out.println("ExampleFragment--onPause");
}
@Override
public void onResume()
{
// TODO Auto-generated method stub
super.onResume();
System.out.println("ExampleFragment--onResume");
}
@Override
public void onStop()
{
// TODO Auto-generated method stub
super.onStop();
System.out.println("ExampleFragment--onStop");
}
}
它的布局:
example_fragment_layout.xml
<?xml version="1.0" encoding="utf-8"?>
<LinearLayout xmlns:android="http://schemas.android.com/apk/res/android"
android:layout_width="match_parent"
android:layout_height="match_parent"
android:orientation="vertical" >
<TextView
android:layout_width="match_parent"
android:layout_height="wrap_content"
android:gravity="left"
android:textSize="20dip"
android:text="@string/fragment1"
/>
<TextView
android:layout_width="match_parent"
android:layout_height="wrap_content"
android:text="@string/num1"
/>
<TextView
android:layout_width="match_parent"
android:layout_height="wrap_content"
android:text="@string/num2"
/>
</LinearLayout>
第二個fragment:
NewFragment.java
package com.example.learningfragment;
import android.os.Bundle;
import android.support.v4.app.Fragment;
import android.view.LayoutInflater;
import android.view.View;
import android.view.ViewGroup;
public class NewFragment extends Fragment
{
//三個一般必須重載的方法
@Override
public void onCreate(Bundle savedInstanceState)
{
// TODO Auto-generated method stub
super.onCreate(savedInstanceState);
System.out.println("NewFragment--onCreate");
}
@Override
public View onCreateView(LayoutInflater inflater, ViewGroup container,
Bundle savedInstanceState)
{
System.out.println("NewFragment--onCreateView");
return inflater.inflate(R.layout.new_fragment_layout, container, false);
}
@Override
public void onPause()
{
// TODO Auto-generated method stub
super.onPause();
System.out.println("NewFragment--onPause");
}
}
new_fragment_layout.xml
<?xml version="1.0" encoding="utf-8"?>
<LinearLayout xmlns:android="http://schemas.android.com/apk/res/android"
android:layout_width="match_parent"
android:layout_height="match_parent"
android:orientation="vertical" >
<TextView
android:layout_width="match_parent"
android:layout_height="wrap_content"
android:textSize="20dip"
android:gravity="left"
android:text="@string/fragment2"
/>
<TextView
android:layout_width="match_parent"
android:layout_height="wrap_content"
android:text="@string/num3"
/>
<TextView
android:layout_width="match_parent"
android:layout_height="wrap_content"
android:text="@string/num4"
/>
</LinearLayout>
主Activity:
LearnFragment.java
package com.example.learningfragment;
import android.os.Bundle;
import android.support.v4.app.FragmentActivity;
import android.support.v4.app.FragmentManager;
import android.support.v4.app.FragmentTransaction;
import android.view.View;
import android.widget.Button;
public class LearnFragment extends FragmentActivity
{
Button btn1;
Button btn2;
Button btn3;
ExampleFragment fragmentE;
NewFragment fragmentN;
FragmentManager fragmentManager;
@Override
public void onCreate(Bundle savedInstanceState)
{
super.onCreate(savedInstanceState);
setContentView(R.layout.activity_learn_fragment);
findViews();
setListeners();
//獲得Fragment管理所需要的類的對象
fragmentManager = getSupportFragmentManager();
}
private void findViews()
{
btn1 = (Button) findViewById(R.id.btn1);
btn2 = (Button) findViewById(R.id.btn2);
btn3 = (Button) findViewById(R.id.btn3);
}
private void setListeners()
{
//第一個按鈕,增加一個ExampleFragment
btn1.setOnClickListener(new Button.OnClickListener()
{
public void onClick(View v)
{
//在程序中加入ExampleFragment
fragmentE = new ExampleFragment();
FragmentTransaction fragmentTransaction = fragmentManager.beginTransaction();
fragmentTransaction.add(R.id.linear1,fragmentE);
fragmentTransaction.addToBackStack(null);
fragmentTransaction.commit();
}
}
);
//第二個按鈕,用一個NewFragment替換前面增加的那個fragment
btn2.setOnClickListener(new Button.OnClickListener()
{
public void onClick(View v)
{
fragmentN = new NewFragment();
FragmentTransaction fragmentTransaction = fragmentManager.beginTransaction();
fragmentTransaction.replace(R.id.linear1,fragmentN);
fragmentTransaction.addToBackStack(null);
fragmentTransaction.commit();
}
}
);
//第三個按鈕,移除fragment
btn3.setOnClickListener(new Button.OnClickListener()
{
public void onClick(View v)
{
FragmentTransaction fragmentTransaction = fragmentManager.beginTransaction();
fragmentTransaction.remove(fragmentN);
fragmentTransaction.addToBackStack(null);
fragmentTransaction.commit();
}
}
);
}
}
activity_learn_fragment.xml
<LinearLayout xmlns:android="http://schemas.android.com/apk/res/android"
xmlns:tools="http://schemas.android.com/tools"
android:id="@+id/linear1"
android:layout_width="match_parent"
android:layout_height="match_parent"
android:orientation="vertical"
>
<TextView
android:layout_width="match_parent"
android:layout_height="wrap_content"
android:textSize="20dip"
android:gravity="center_horizontal"
android:text="@string/layout1"
/>
<Button
android:id="@+id/btn1"
android:layout_width="fill_parent"
android:layout_height="wrap_content"
android:text="@string/btn1"
/>
<fragment
android:name="com.example.learningfragment.ExampleFragment"
android:id="@+id/fragment1"
android:layout_width="match_parent"
android:layout_height="wrap_content"
/>
<Button
android:id="@+id/btn2"
android:layout_width="fill_parent"
android:layout_height="wrap_content"
android:text="@string/btn2"
/>
<LinearLayout
xmlns:android="http://schemas.android.com/apk/res/android"
android:id="@+id/linear2"
android:layout_width="fill_parent"
android:layout_height="wrap_content"
android:orientation="vertical"
>
<TextView
android:layout_width="match_parent"
android:layout_height="wrap_content"
android:textSize="20dip"
android:gravity="center_horizontal"
android:text="@string/layout2"
/>
<Button
android:id="@+id/btn3"
android:layout_width="fill_parent"
android:layout_height="wrap_content"
android:text="@string/btn3"
/>
</LinearLayout>
</LinearLayout>
資源:
strings.xml
<resources>
<string name="app_name">LearningFragment</string>
<string name="hello_world">Hello world!</string>
<string name="menu_settings">Settings</string>
<string name="title_activity_learn_fragment">LearnFragment</string>
<string name="layout1">LinearLayout1</string>
<string name="layout2">LinearLayout2</string>
<string name="fragment1">FragmentType1</string>
<string name="fragment2">FragmentType2</string>
<string name="num1">NO.1</string>
<string name="num2">NO.2</string>
<string name="num3">NO.3</string>
<string name="num4">NO.4</string>
<string name="btn1">Add fragment</string>
<string name="btn2">Replace fragment</string>
<string name="btn3">Remove fragment</string>
</resources>
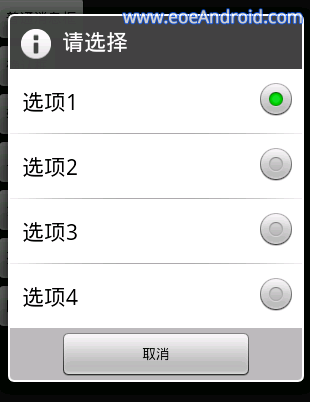
程序運(yùn)行截圖:

參考資料:
API Guides:Fragments
http://developer.android.com/guide/components/fragments.html
FragmentManager類文檔:
http://developer.android.com/reference/android/app/FragmentManager.html
FragmentTransaction類文檔
http://developer.android.com/reference/android/app/FragmentTransaction.html