CentOS 7.0系統安裝配置圖解教程
http://www.osyunwei.com/archives/7829.html
一、配置防火墻,開啟80端口、3306端口
CentOS 7.0默認使用的是firewall作為防火墻,這里改為iptables防火墻。
1、關閉firewall:
systemctl stop firewalld.service #停止firewall
systemctl disable firewalld.service #禁止firewall開機啟動
2、安裝iptables防火墻
yum install iptables-services #安裝
vi /etc/sysconfig/iptables #編輯防火墻配置文件
# Firewall configuration written by system-config-firewall
# Manual customization of this file is not recommended.
*filter
:INPUT ACCEPT [0:0]
:FORWARD ACCEPT [0:0]
:OUTPUT ACCEPT [0:0]
-A INPUT -m state --state ESTABLISHED,RELATED -j ACCEPT
-A INPUT -p icmp -j ACCEPT
-A INPUT -i lo -j ACCEPT
-A INPUT -m state --state NEW -m tcp -p tcp --dport 22 -j ACCEPT
-A INPUT -m state --state NEW -m tcp -p tcp --dport 80 -j ACCEPT
-A INPUT -m state --state NEW -m tcp -p tcp --dport 3306 -j ACCEPT
-A INPUT -j REJECT --reject-with icmp-host-PRohibited
-A FORWARD -j REJECT --reject-with icmp-host-prohibited
COMMIT
:wq! #保存退出
systemctl restart iptables.service #最后重啟防火墻使配置生效
systemctl enable iptables.service #設置防火墻開機啟動
二、關閉SElinux
vi /etc/selinux/config
#SELINUX=enforcing #注釋掉
#SELINUXTYPE=targeted #注釋掉
SELINUX=disabled #增加
:wq! #保存退出
setenforce 0 #使配置立即生效
三 、系統約定
軟件源代碼包存放位置:/usr/local/src
源碼包編譯安裝位置:/usr/local/軟件名字
四、下載軟件包
1、下載nginx(目前穩定版)
http://nginx.org/download/nginx-1.6.0.tar.gz
2、下載MySQL
http://cdn.mysql.com/archives/mysql-5.6/mysql-5.6.19.tar.gz
3、下載php
http://cn2.php.net/distributions/php-5.5.14.tar.gz
4、下載pcre (支持nginx偽靜態)
ftp://ftp.csx.cam.ac.uk/pub/software/programming/pcre/pcre-8.35.tar.gz
5、下載openssl(nginx擴展)
http://www.openssl.org/source/openssl-1.0.1h.tar.gz
6、下載zlib(nginx擴展)
http://zlib.net/zlib-1.2.8.tar.gz
7、下載cmake(MySQL編譯工具)
http://www.cmake.org/files/v2.8/cmake-2.8.11.2.tar.gz
8、下載libmcrypt(php擴展)
http://nchc.dl.sourceforge.net/project/mcrypt/Libmcrypt/2.5.8/libmcrypt-2.5.8.tar.gz
9、下載yasm(php擴展)
http://www.tortall.net/projects/yasm/releases/yasm-1.2.0.tar.gz
10、t1lib(php擴展)
ftp://sunsite.unc.edu/pub/Linux/libs/graphics/t1lib-5.1.2.tar.gz
11、下載gd庫安裝包
https://bitbucket.org/libgd/gd-libgd/downloads/libgd-2.1.0.tar.gz
12、libvpx(gd庫需要)
https://webm.googlecode.com/files/libvpx-v1.3.0.tar.bz2
13、tiff(gd庫需要)
http://download.osgeo.org/libtiff/tiff-4.0.3.tar.gz
14、libpng(gd庫需要)
ftp://ftp.simplesystems.org/pub/png/src/libpng16/libpng-1.6.12.tar.gz
15、freetype(gd庫需要)
http://ring.u-toyama.ac.jp/archives/graphics/freetype/freetype2/freetype-2.5.3.tar.gz
16、jpegsrc(gd庫需要)
http://www.ijg.org/files/jpegsrc.v9a.tar.gz
以上軟件包使用WinSCP工具上傳到/usr/local/src目錄
WinSCP下載地址:http://winscp.net/download/winscp554.zip
系統運維 www.osyunwei.com 溫馨提醒:qihang01原創內容?版權所有, index.htm index.php; #添加index.php
# pass the PHP scripts to FastCGI server listening on 127.0.0.1:9000
#
location ~ /.php$ {
root html;
fastcgi_pass 127.0.0.1:9000;
fastcgi_index index.php;
fastcgi_param SCRIPT_FILENAME $document_root$fastcgi_script_name;
include fastcgi_params;
}
#取消FastCGI server部分location的注釋,注意fastcgi_param行的參數,改為$document_root$fastcgi_script_name,或者使用絕對路徑
/etc/init.d/nginx restart #重啟nginx
service php-fpm start #啟動php-fpm
測試篇
cd /usr/local/nginx/html/ #進入nginx默認網站根目錄
rm -rf /usr/local/nginx/html/* #刪除默認測試頁
vi index.php #新建index.php文件
<?php
phpinfo();
?>
:wq! #保存退出
chown www.www /usr/local/nginx/html/ -R #設置目錄所有者
chmod 700 /usr/local/nginx/html/ -R #設置目錄權限
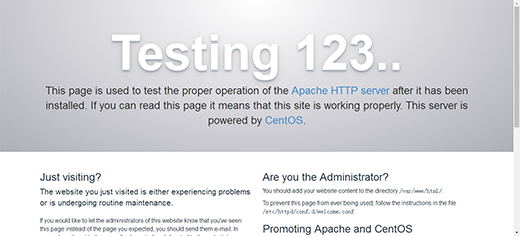
在瀏覽器中打開服務器IP地址,會看到下面的界面

至此,CentOS 7.0編譯安裝Nginx1.6.0+MySQL5.6.19+PHP5.5.14教程完成。
新聞熱點


疑難解答