數(shù)據(jù)庫性能優(yōu)化普遍采用集群方式,oracle集群軟硬件投入昂貴,今天花了一天時(shí)間搭建基于mysql的集群環(huán)境。
主要思路
簡單說,實(shí)現(xiàn)mysql主備復(fù)制-->利用mycat實(shí)現(xiàn)負(fù)載均衡。
比較了常用的讀寫分離方式,推薦mycat,社區(qū)活躍,性能穩(wěn)定。
測試環(huán)境
MYSQL版本:Server version: 5.5.53,到官網(wǎng)可以下載WINDWOS安裝包。
注意:確保mysql版本為5.5以后,以前版本主備同步配置方式不同。
linux實(shí)現(xiàn)思路類似,修改my.cnf即可。
實(shí)現(xiàn)mysql主備復(fù)制
主要思路:A主mysql開啟日志,B備mysql讀取操作日志,同步執(zhí)行。
一般為主備同步,主主同步不推薦使用。
配置A主mysql
1)修改my.ini。需要在log-bin="C:/Program Files/MySQL/MySQL Server 5.5/log/mysql-bin.log"的相關(guān)位置創(chuàng)建log目錄,以及mysql-bin.log文件。
[mysqld]server-id=1 #主機(jī)標(biāo)示,整數(shù)port=3306 log-bin="C:/Program Files/MySQL/MySQL Server 5.5/log/mysql-bin.log" #確保此文件可寫read-only=0 #主機(jī),讀寫都可以binlog-do-db=sync_test #需要備份數(shù)據(jù)庫,多個(gè)寫多行binlog-ignore-db=mysql #不需要備份的數(shù)據(jù)庫,多個(gè)寫多行
2)允許MYSQL遠(yuǎn)程訪問
#登錄mysql console進(jìn)入%home%/bin,執(zhí)行mysql -uroot -proot#授權(quán)。允許root用戶,從192.168.110.*的IP范圍 遠(yuǎn)程訪問A主mysqlmysql>GRANT ALL PRIVILEGES ON *.* TO 'root'@'192.168.110.*' IDENTIFIED BY 'root' WITH GRANT OPTION;#生效。該操作很重要!mysql>FLUSH PRIVILEGES;
3)重啟A主mysql數(shù)據(jù)庫
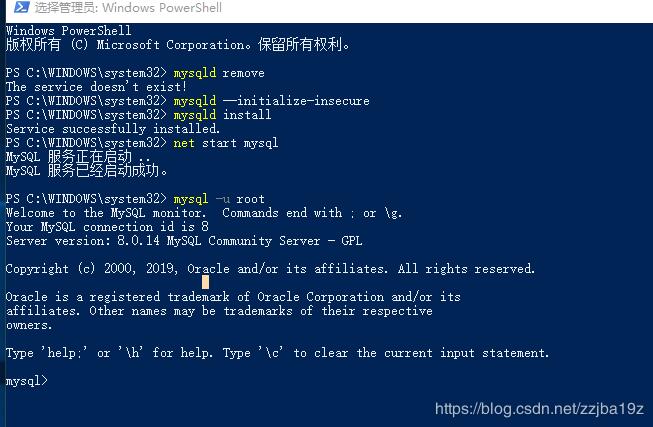
進(jìn)入%home%/bin,執(zhí)行mysql -uroot -proot
mysql>net stop mysql;mysql>net start mysql;
4)查看主mysql日志狀態(tài)
mysql> show master status/G;*************************** 1. row *************************** File: mysql-bin.000003 Position: 107 Binlog_Do_DB: sync_testBinlog_Ignore_DB: mysql1 row in set (0.00 sec)ERROR:No query specified
配置B備mysql
1)修改my.ini。需要在log-bin="C:/Program Files/MySQL/MySQL Server 5.5/log/mysql-bin.log"的相關(guān)位置創(chuàng)建log目錄,以及mysql-bin.log文件。
[mysqld]# add for sycn testserver-id=2 #從機(jī)標(biāo)識(shí)log-bin="C:/Program Files/MySQL/MySQL Server 5.5/log/mysql-bin.log" #確保此文件可寫#master-host="192.168.110.1" #主機(jī)Ip#master-user=root #數(shù)據(jù)庫訪問用戶名#master-pass=root #數(shù)據(jù)庫訪問密碼#master-port=3306 #主機(jī)端口#master-connect-retry=60 #如果從服務(wù)器發(fā)現(xiàn)主服務(wù)器斷掉,重新連接的時(shí)間差(秒)replicate-do-db=sync_test #只復(fù)制某個(gè)庫replicate-ignore-db=mysql #不復(fù)制某個(gè)庫
2)重啟B備mysql數(shù)據(jù)庫
進(jìn)入%home%/bin,執(zhí)行mysql -uroot -proot
mysql>net stop mysql;mysql>net start mysql;
3)配置B備數(shù)據(jù)庫的數(shù)據(jù)來源,核實(shí)高亮處的狀態(tài)是否正常。
mysql>change master to master_host='192.168.110.1',master_port='3306',master_user='root',master_password='root';mysql>slave start;mysql>show slave status/G;*************************** 1. row *************************** Slave_IO_State: Waiting for master to send even Master_Host: 192.168.110.1 Master_User: root Master_Port: 3306 Connect_Retry: 60 Master_Log_File: mysql-bin.000003 Read_Master_Log_Pos: 107 Relay_Log_File: wjt-1c698d8a032-relay-bin.00001 Relay_Log_Pos: 253 Relay_Master_Log_File: mysql-bin.000003 Slave_IO_Running: Yes Slave_SQL_Running: Yes Replicate_Do_DB: sync_test Replicate_Ignore_DB: mysql Replicate_Do_Table: Replicate_Ignore_Table: Replicate_Wild_Do_Table: Replicate_Wild_Ignore_Table: Last_Errno: 0 Last_Error: Skip_Counter: 0 Exec_Master_Log_Pos: 107 Relay_Log_Space: 565 Until_Condition: None Until_Log_File: Until_Log_Pos: 0 Master_SSL_Allowed: No Master_SSL_CA_File: Master_SSL_CA_Path: Master_SSL_Cert: Master_SSL_Cipher: Master_SSL_Key: Seconds_Behind_Master: 0Master_SSL_Verify_Server_Cert: No Last_IO_Errno: 0 Last_IO_Error: Last_SQL_Errno: 0 Last_SQL_Error: Replicate_Ignore_Server_Ids: Master_Server_Id: 11 row in set (0.00 sec)ERROR:No query specified
驗(yàn)證同步配置結(jié)果
實(shí)現(xiàn)讀寫分離
主要思路:使用mycat中間件,轉(zhuǎn)發(fā)sql指令到后端mysql節(jié)點(diǎn)。mycat不負(fù)責(zé)數(shù)據(jù)庫同步。
安裝mycat
mycat是什么?可以認(rèn)為它是一個(gè)數(shù)據(jù)庫訪問中間件,但更像f5、ngnix等產(chǎn)品,具備訪問路由、多表分表分片操作等功能。總之很強(qiáng)大。
安裝完畢
配置mycat
1)server.xml。配置訪問用戶及權(quán)限。修改高亮處信息,其中admin、user為訪問mycat的用戶,TESTDB為mycat虛擬的數(shù)據(jù)庫,供上層應(yīng)用訪問。
<user name="admin"> <property name="password">admin</property> <property name="schemas">TESTDB</property> <!-- 表級 DML 權(quán)限設(shè)置 --> <!-- <privileges check="false"> <schema name="TESTDB" dml="0110" > <table name="tb01" dml="0000"></table> <table name="tb02" dml="1111"></table> </schema> </privileges> --> </user> <user name="user"> <property name="password">user</property> <property name="schemas">TESTDB</property> <property name="readOnly">true</property> </user>
2)schema.xml。這部分不太好理解,精簡了一下,主要分schema、dataNode、dataHost三個(gè)主要配置。
<scheme>節(jié)點(diǎn)定義了mycat的虛擬數(shù)據(jù)庫為TESTDB, balance="1":write操作路由到A機(jī),讀操作路由到B。
<?xml version="1.0"?><!DOCTYPE mycat:schema SYSTEM "schema.dtd"><mycat:schema xmlns:mycat="http://io.mycat/"> <schema name="TESTDB" checkSQLschema="false" sqlMaxLimit="100" dataNode="dn1"> <!-- 這里不配置,代表所有的表分片到dn1節(jié)點(diǎn)--> </schema> <dataNode name="dn1" dataHost="localhost1" database="sync_test" /> <dataHost name="localhost1" maxCon="1000" minCon="10" balance="1" writeType="0" dbType="mysql" dbDriver="native" switchType="1" slaveThreshold="100"> <heartbeat>select user()</heartbeat> <!-- can have multi write hosts --> <writeHost host="hostM1" url="192.168.110.1:3306" user="root" password="root"> <!-- can have multi read hosts --> <readHost host="hostS2" url="192.168.110.2:3306" user="root" password="root" /> </writeHost> </dataHost></mycat:schema>
啟動(dòng)mycat
1)啟動(dòng)mycat
D:/dev-bin/mycat/bin>startup_nowrap.bat
后臺(tái)信息如下:
D:/dev-bin/mycat/bin>startup_nowrap.bat
D:/dev-bin/mycat/bin>REM check JAVA_HOME & java
D:/dev-bin/mycat/bin>set "JAVA_CMD=C:/Program Files (x86)/Java/jdk1.7.0_13/bin/java"
D:/dev-bin/mycat/bin>if "C:/Program Files (x86)/Java/jdk1.7.0_13" == "" goto noJavaHome
D:/dev-bin/mycat/bin>if exist "C:/Program Files (x86)/Java/jdk1.7.0_13/bin/java.exe" goto mainEntry
D:/dev-bin/mycat/bin>REM set HOME_DIR
D:/dev-bin/mycat/bin>set "CURR_DIR=D:/dev-bin/mycat/bin"
D:/dev-bin/mycat/bin>cd ..
D:/dev-bin/mycat>set "MYCAT_HOME=D:/dev-bin/mycat"
D:/dev-bin/mycat>cd D:/dev-bin/mycat/bin
#如果啟動(dòng)失敗,請修改D:/dev-bin/mycat/bin/startup_nowrap.bat文件中的以下參數(shù)。默認(rèn)占用內(nèi)存為2G
D:/dev-bin/mycat/bin>"C:/Program Files (x86)/Java/jdk1.7.0_13/bin/java" -server -Xms512m -Xmx512m -XX:MaxPermSize=64M -XX:+AggressiveOpts -XX:MaxDirectMemorySize=768m -DMYCAT_HOME=D:/
p "../conf;../lib/*" io.mycat.MycatStartup
MyCAT Server startup successfully. see logs in logs/mycat.log #啟動(dòng)成功將看到如下信息。
注意:如日志中出現(xiàn)192.168.110.2 not connected 等信息,請?jiān)试SB備mysql遠(yuǎn)程訪問。
#登錄mysql console進(jìn)入%home%/bin,執(zhí)行mysql -uroot -proot#授權(quán)。允許root用戶,從192.168.110.*的IP范圍 遠(yuǎn)程訪問Bmysqlmysql>GRANT ALL PRIVILEGES ON *.* TO 'root'@'192.168.110.*' IDENTIFIED BY 'root' WITH GRANT OPTION;#生效,該操作很重要!mysql>FLUSH PRIVILEGES;
測試讀寫分離
驗(yàn)證是否同步
關(guān)閉B備mysql的同步,驗(yàn)證讀寫分離
mysql> slave stop;Query OK, 0 rows affected (0.00 sec)mysql> show slave status/G;*************************** 1. row *************************** Slave_IO_State: Master_Host: 192.168.110.1 Master_User: root Master_Port: 3306 Connect_Retry: 60 Master_Log_File: mysql-bin.000003 Read_Master_Log_Pos: 478 Relay_Log_File: wjt-1c698d8a032-relay-bin.00001 Relay_Log_Pos: 624 Relay_Master_Log_File: mysql-bin.000003 Slave_IO_Running: No Slave_SQL_Running: No Replicate_Do_DB: sync_test Replicate_Ignore_DB: mysql Replicate_Do_Table: Replicate_Ignore_Table: Replicate_Wild_Do_Table: Replicate_Wild_Ignore_Table: Last_Errno: 0 Last_Error: Skip_Counter: 0 Exec_Master_Log_Pos: 478 Relay_Log_Space: 936 Until_Condition: None Until_Log_File: Until_Log_Pos: 0 Master_SSL_Allowed: No Master_SSL_CA_File: Master_SSL_CA_Path: Master_SSL_Cert: Master_SSL_Cipher: Master_SSL_Key: Seconds_Behind_Master: NULLMaster_SSL_Verify_Server_Cert: No Last_IO_Errno: 0 Last_IO_Error: Last_SQL_Errno: 0 Last_SQL_Error: Replicate_Ignore_Server_Ids: Master_Server_Id: 11 row in set (0.00 sec)ERROR:No query specified
3)使用navicat連接mycat,操作方式和連接物理mysql庫一致,用戶admin,密碼admin,端口8066
原因:mycat將查詢sq路由到B,因此讀取的結(jié)果集不一致。
最后,mycat使用可以參見官網(wǎng)的權(quán)威指南學(xué)習(xí)。雙主雙備架構(gòu)待后續(xù)更新。
總結(jié)
以上所述是小編給大家介紹的基于mysql+mycat搭建穩(wěn)定高可用集群負(fù)載均衡主備復(fù)制讀寫分離操作,希望對大家有所幫助,如果大家有任何疑問請給我留言,小編會(huì)及時(shí)回復(fù)大家的。在此也非常感謝大家對VeVb武林網(wǎng)網(wǎng)站的支持!
新聞熱點(diǎn)


疑難解答
圖片精選