最近學習了貝塞爾曲線的一些知識,剛好項目中需要實現一個圓形進度,然后就將實現的waveView記錄一下。需要使用的知識大概有自定義view、貝塞爾曲線、valueAnimator(屬性動畫)、Xfermode等。
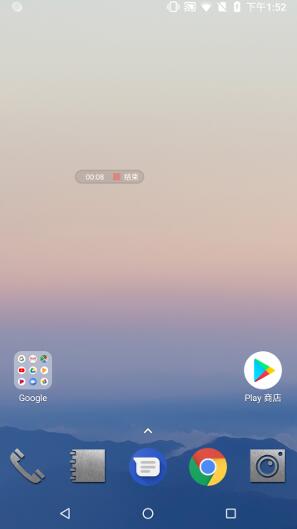
以下為效果圖:
廢話不多說,直接上代碼這里只是一些重要的代碼。如果需要demo可以去下載。
首先需要自定義view的屬性:
<declare-styleable name="custom_wave_view_attr"> <attr name="circle_color" format="color"></attr> //圓的顏色 <attr name="circle_background_color" format="color"></attr> //圓的背景色 <attr name="progress_wave_color" format="color"></attr> //水波紋的顏色 <attr name="progress_text_size" format="dimension"></attr> //字體的大小 <attr name="progress_text_color" format="color"></attr> //字體的顏色</declare-styleable>
第二步自定義CustomWaveView
1、實現構造方法,在構造方法中獲取屬性值
TypedArray ta = context.obtainStyledAttributes(attrs,R.styleable.custom_wave_view_attr);//圓的顏色circle_color = ta.getColor(R.styleable.custom_wave_view_attr_circle_color,getResources().getColor(android.R.color.black));//圓的背景色circle_bg_color = ta.getColor(R.styleable.custom_wave_view_attr_circle_background_color,getResources().getColor(android.R.color.white));//水波紋顏色wave_color = ta.getColor(R.styleable.custom_wave_view_attr_progress_wave_color,getResources().getColor(android.R.color.holo_blue_dark));//字體的顏色text_color = ta.getColor(R.styleable.custom_wave_view_attr_progress_text_color,getResources().getColor(android.R.color.black));//字體的大小textSize = ta.getDimension(R.styleable.custom_wave_view_attr_progress_text_size,30f);//釋放資源ta.recycle();
2、初始化畫筆
//初始化背景圓畫筆mBgCirclePaint = new Paint();//抗鋸齒mBgCirclePaint.setAntiAlias(true);//設置背景圓的背景色mBgCirclePaint.setColor(circle_bg_color);//設置充滿mBgCirclePaint.setStyle(Paint.Style.FILL);//初始化水波紋畫筆mWavePaint = new Paint();//抗鋸齒mWavePaint.setAntiAlias(true);//設置水波紋的背景色mWavePaint.setColor(wave_color);//設置充滿mWavePaint.setStyle(Paint.Style.FILL);//使用Xfermode獲取重疊部分mWavePaint.setXfermode(new PorterDuffXfermode(PorterDuff.Mode.SRC_IN));
3、繪制貝塞爾曲線。以下為原理圖。
/*** 初始化貝塞爾曲線上的點*/private void reset() { startP = new PointF(-width, height); nextP = new PointF(-width/2, height); threeP = new PointF(0, height); fourP = new PointF(width/2, height); endP = new PointF(width, height); controllerP1 = new PointF(-width/4, height); controllerP2 = new PointF(-width * 3/4, height); controllerP3 = new PointF(width/4, height); controllerP4 = new PointF(width * 3/4, height);}4、在onDraw方法中畫貝塞爾曲線和圓
@Overrideprotected void onDraw(Canvas canvas) { super.onDraw(canvas); //在透明畫布上畫背景圓 mCanvas.drawCircle(width/2, height/2, radius, mBgCirclePaint); //貝塞爾曲線 mPath.reset(); mPath.moveTo(startP.x, startP.y); mPath.quadTo(controllerP1.x, controllerP1.y, nextP.x, nextP.y); mPath.quadTo(controllerP2.x, controllerP2.y, threeP.x, threeP.y); mPath.quadTo(controllerP3.x, controllerP3.y, fourP.x, fourP.y); mPath.quadTo(controllerP4.x, controllerP4.y, endP.x, endP.y); mPath.lineTo(endP.x, height); mPath.lineTo(-width, height); //在透明畫布上繪制水波紋 mCanvas.drawPath(mPath,mWavePaint); //將畫好的圓繪制在畫布上 canvas.drawBitmap(mBitmap, 0, 0, null);}5、使用動畫讓貝塞爾曲線動起來
/*** 開始動畫 讓startP的x點坐標在2S時間內循環移動到0點。* depth---進度* waveRipple----水波紋的振幅*/private void startAnimator() { animator = ValueAnimator.ofFloat(startP.x, 0); animator.setInterpolator(new LinearInterpolator()); animator.setDuration(2000); //重復循環 animator.setRepeatCount(ValueAnimator.INFINITE); animator.addUpdateListener(new ValueAnimator.AnimatorUpdateListener() { @Override public void onAnimationUpdate(ValueAnimator animation) { startP.x = (Float) animation.getAnimatedValue(); startP = new PointF(startP.x, height - depth); nextP = new PointF(startP.x + width/2, height - depth); threeP = new PointF(nextP.x + width/2, height - depth); fourP = new PointF(threeP.x + width/2, height - depth); endP = new PointF(fourP.x + width/2, height - depth); controllerP1 = new PointF(startP.x + width/4, height - depth + waveRipple); controllerP2 = new PointF(nextP.x + width/4, height - depth - waveRipple); controllerP3 = new PointF(threeP.x + width/4, height - depth + waveRipple); controllerP4 = new PointF(fourP.x + width/4, height - depth - waveRipple); invalidate(); } }); animator.start();}第三步在XML中使用自定義View
<com.criclewaveview_master.CustomWaveView android:id="@+id/custom_circle_wave_view" android:layout_width="wrap_content" android:layout_height="wrap_content" wave:circle_color = "@color/circle_color" android:layout_centerInParent="true" wave:circle_background_color = "@color/circle_bg_color" wave:progress_wave_color = "@color/colorAccent" wave:progress_text_size = "20sp" wave:progress_text_color = "@color/circle_color"/>
這樣就完成了自定義WaveView。
以上就是本文的全部內容,希望對大家的學習有所幫助,也希望大家多多支持VEVB武林網。
新聞熱點


疑難解答